API Gateway는 AWS의 Managed HTTP(S) Proxy 서비스로 HTTP(S) / Websocket 프로토콜을 지원하며, EC2 / Lambda / DynamoDB / 외부 HTTP(S) 통신 등 다양한 Application과 Integration 되어있다.
API Gateway는 기본적으로 AWS에서 관리하는 VPC 내에 존재하기 때문에 Public 서비스로 WAF와 연동도 가능하다.
또한 End-Point(Private Link)도 지원하기 때문에 사용자의 VPC 내에서 Security Group을 통해서도 네트워크 제어가 가능하다.
그 외 Caching, Header, QueryString 조작, 요청 Threshold 관리 등 매우 다양한 기능이 있음.
이번 블로깅은 API Gateway의 VPC Endpoint와 인증에 관해서 남긴다.
먼저 VPC의 Endpoints에서 아래와 같은 리소스를 생성한다.


VPC End Point 생성 시 EC2 Network Interfaces에서 지정한 Subnet에서 두 개의 ENI가 생성된 것을 확인할 수 있다. 또한 VPC 콘솔에서 End Point에 대한 URL을 확인할 수 있다. 해당 URL로 질의하면 생성된 VPC의 내부든 외부든 생성된 사설 ENI의 IP주소를 받을 수 있다.
여기서 host header를 통해 생성한 API Gateway로 접근 가능하다. (VPN/DX 연결 시)

순서가 좀 바뀌었는데... API Gateway 생성 후 보여지는 URL의 경우 DNS 질의는 VPC 내부 EC2, Lambda 등의 Resource 에서만 가능하다. 이 URL의 경우 요청 시 host header가 필요하지 않다.

API Gateway를 생성 시 Endpoint Tpye을 Private로 생성한다. 그리고 API Resource들을 나열하고, Endpoint ENI가 API Gateway에 접근할 수 있도록 Resource Policy 항목에 아래 Policy를 기입한다.
{
    "Version": "2012-10-17",
    "Statement": [
        {
            "Effect": "Allow",
            "Principal": "*",
            "Action": "execute-api:Invoke",
            "Resource": "arn:aws:execute-api:ap-northeast-2:5576xxxx1750:2ypapxxx0wa/*",
            "Condition": {
                "StringEquals": {
                    "aws:sourceVpce": "vpce-02xxxxx82560066"
                }
            }
        }
    ]
}
그럼 이제 같은 VPC 내의 EC2, Lambda 등에서만 API Gateway 접근이 가능하다. (EC2 <-> VPC Endpoint ENI <-> API Gateway)
[인증]
API Gateway 인증을 구현하기 위해서는 두 가지 방식이 있는데, 첫 번째는 API Key를 발급하는 것이고 또 다른 하나는 S3 인증과 같이 Signature v4를 이용하여 1회성 혹은 Timeline을 제한할 수 있다.
API Key 같은 경우 Hash 값을 Header에 포함해서 보내는 형태로 토큰 기반은 아니다. API Key는 그냥 API Key를 발급받고 헤더에 해당 Key를 추가하여 인증하는 형태다.
반면 Signature v4의 경우 토큰 기반 인증이다.
Signature v4: https://docs.aws.amazon.com/ko_kr/general/latest/gr/sigv4-create-canonical-request.html
이번 인증은 Signature v4를 설명한다.
Resource의 Method 항목의 Authorization을 AWS_IAM로 선택

Signature v4를 만들기 위해서는 Access/Secret Key이나 Role에 아래와 같은 Policy가 필요하다.
{
    "Version": "2012-10-17",
    "Statement": [
        {
            "Sid": "VisualEditor0",
            "Effect": "Allow",
            "Action": [
                "execute-api:Invoke",
                "lambda:InvokeFunction" ##(BackEnd를 Lambda 사용 시 추가)
            ],
            "Resource": "*"
        }
    ]
}
Resource 부분에는 각 Path에 대한 ARN이 있으므로 필요한 ARN만 입력하면 된다.
아래 예시는 API Gateway -> Lambda -> DynamoDB(데이터는 영화 정보)
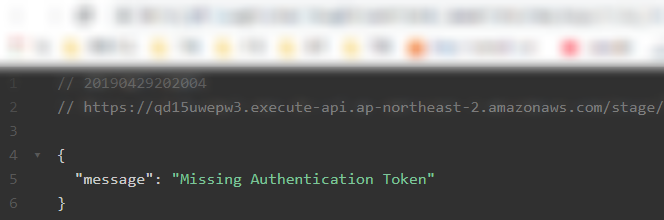
먼저 브라우저에서 AWS_IAM 인증 설정이 없는 API Gateway URL 접근 시

AWS_IAM 인증 설정을 한 API Gateway URL 접근 시
Postman에서는 AWS Signature v4를 지원한다. 위 Policy를 매핑한 Access/Secret Key를 통해 Signature v4를 생성한다.
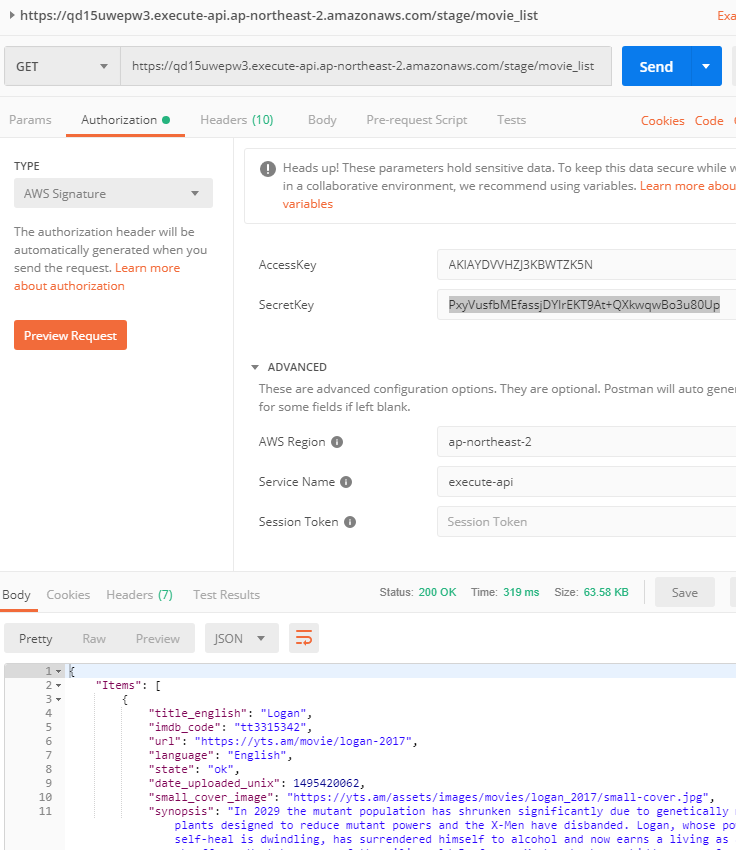
Access/Secret Key, Region, Service Name 정보를 입력하고 GET 요청을 하면 아래와 같이 Authorization Header 값을 추가하여 API Gateway로 요청을 보내고, 성공적으로 Data를 받아올 수 있다.

Signature v4 예제: https://docs.aws.amazon.com/ko_kr/general/latest/gr/signature-v4-examples.html
각 필요한 변수 값을 확인할 수 있다.
node.js에서는 AWS Signature v4 그리고 API Gateway에 대한 패키지가 존재한다.
aws-api-gateway-client: https://www.npmjs.com/package/aws-api-gateway-client
해당 패키지 예제를 이용한 샘플은 아래와 같다.
const apigClientFactory = require('aws-api-gateway-client').default;
const config = {
invokeUrl: 'https://qd15uwepw3.execute-api.ap-northeast-2.amazonaws.com/stage/movie_list', // REQUIRED
accessKey: 'AKIAYDVVHxxxTZK5N', // REQUIRED
secretKey: 'PxyVusfbMEfassjDYxxxxo3u80Up', // REQUIRED
sessionToken: '', //OPTIONAL: If you are using temporary credentials you must include the session token
region: 'ap-northeast-2', // REQUIRED: The region where the API is deployed.
systemClockOffset: 0, // OPTIONAL: An offset value in milliseconds to apply to signing time
retries: 4, // OPTIONAL: Number of times to retry before failing. Uses axon-retry plugin.
retryCondition: (err) => { // OPTIONAL: Callback to further control if request should be retried. Uses axon-retry plugin.
return err.response && err.response.status === 500;
}
}
const apigClient = apigClientFactory.newClient(config);
const pathParams = {
//This is where path request params go.
};
// Template syntax follows url-template https://www.npmjs.com/package/url-template
const pathTemplate = ''
const method = 'GET';
const additionalParams = {};
const body = {};
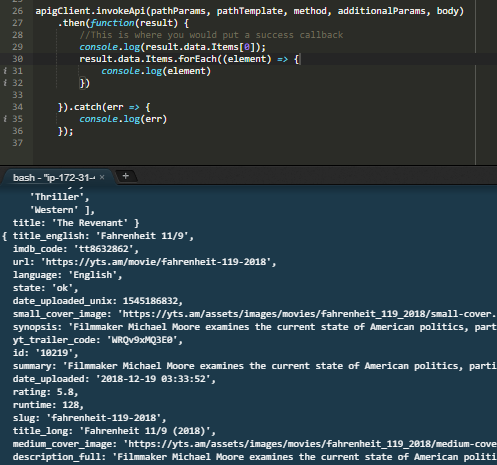
apigClient.invokeApi(pathParams, pathTemplate, method, additionalParams, body)
.then(function(result) {
//This is where you would put a success callback
console.log(result.data.Items[0]);
result.data.Items.forEach((element) => {
console.log(element)
})
}).catch(err => {
console.log(err)
});
위의 샘플코드를 사용하면 아래와 같이 Signature v4를 활용하여 인증이 성공되고 아래와 같은 결과 값을 받을 수 있다. 인증 값은 계속 변경되며 옵션을 통해 인증 시간 등을 추가할 수도 있다.
끝
🍉🍉🍉🍉
'Networking > API Gateway' 카테고리의 다른 글
| API Gateway, DynamoDB 사용 시 주의사항 (0) | 2020.05.19 |
|---|---|
| Amazon API Gateway Proxy 모드 (0) | 2020.02.18 |

